

Hey there! As a supplier of T - type Milling Cutters, I've seen firsthand how crucial it is to install these tools correctly. A proper installation not only ensures the best performance of the cutter but also extends its lifespan and keeps you safe during operation. So, let's dive into how to install a T - type Milling Cutter correctly.
Pre - installation Checks
Before you even start thinking about installing the T - type Milling Cutter, there are a few important checks you need to do. First off, examine the cutter itself. Look for any visible signs of damage like cracks, chips, or worn - out edges. A damaged cutter can not only give you poor machining results but can also be dangerous. If you spot any issues, don't use it. Instead, you might want to check out our Forming End Mills or Superhard Material Cutting Tools as alternatives.
Next, take a close look at the milling machine. Check the spindle where the cutter will be installed. Make sure it's clean and free from any debris, dirt, or old cutting fluid. A dirty spindle can prevent the cutter from being seated properly, leading to vibrations and inaccurate cuts. You can use a clean cloth and some appropriate cleaning solvent to wipe down the spindle.
Also, verify that the machine's coolant system is working correctly. Coolant plays a vital role in keeping the cutter cool during operation, reducing heat - related wear and tear. If the coolant isn't flowing as it should, it could cause the cutter to overheat and fail prematurely.
Selecting the Right Arbors and Holders
The choice of arbors and holders is super important for a successful T - type Milling Cutter installation. You need to pick an arbor and holder that are compatible with both the cutter and the milling machine. The arbor should have the right diameter and length to fit the cutter properly. A loose - fitting arbor can cause the cutter to wobble, while an overly tight one can damage the cutter or the arbor itself.
When it comes to holders, there are different types available, such as collet holders and end - mill holders. Collet holders are great for holding smaller cutters securely, while end - mill holders are often used for larger ones. Make sure the holder you choose has the correct size and taper to match the cutter's shank.
Installing the T - type Milling Cutter
Now, let's get to the actual installation process. First, switch off the milling machine and make sure it's completely powered down. This is a basic safety measure that can prevent any accidental starts during the installation.
Carefully insert the cutter into the arbor or holder. Make sure it goes in straight and is fully seated. You may need to use a gentle tapping motion with a soft - faced hammer to ensure the cutter is properly positioned. But be very careful not to hit it too hard, as this can damage the cutter.
Once the cutter is in the arbor or holder, tighten the clamping mechanism. Different holders have different ways of tightening. For example, collet holders usually require a special wrench to tighten the collet around the cutter shank. Make sure you follow the manufacturer's instructions for tightening. Over - tightening can damage the cutter or the holder, while under - tightening can cause the cutter to come loose during operation.
After tightening the cutter, double - check its alignment. You can use a dial indicator to measure the runout of the cutter. The runout should be within the acceptable limits specified by the cutter manufacturer. If the runout is too high, you may need to re - install the cutter or check for any issues with the arbor or holder.
Setting the Cutting Depth and Feed Rate
After installing the T - type Milling Cutter, you need to set the cutting depth and feed rate correctly. The cutting depth refers to how deep the cutter will penetrate into the workpiece during each pass. The feed rate is the speed at which the workpiece moves relative to the cutter.
These settings depend on several factors, such as the material of the workpiece, the type of cutter, and the power of the milling machine. For example, if you're cutting a hard material like stainless steel, you'll probably need a smaller cutting depth and a slower feed rate compared to cutting a softer material like aluminum.
It's always a good idea to start with conservative settings and gradually increase them as you observe the performance of the cutter. This way, you can avoid overloading the cutter and getting poor machining results.
Post - installation Checks
Once you've installed the cutter and set the cutting parameters, do a final set of checks before starting the milling operation. First, visually inspect the cutter again to make sure it's still properly installed and aligned. Check that all the clamping mechanisms are tight.
Next, run the milling machine at a low speed without any workpiece. Listen for any unusual noises or vibrations. If you hear any strange sounds or feel excessive vibrations, stop the machine immediately and re - check the installation.
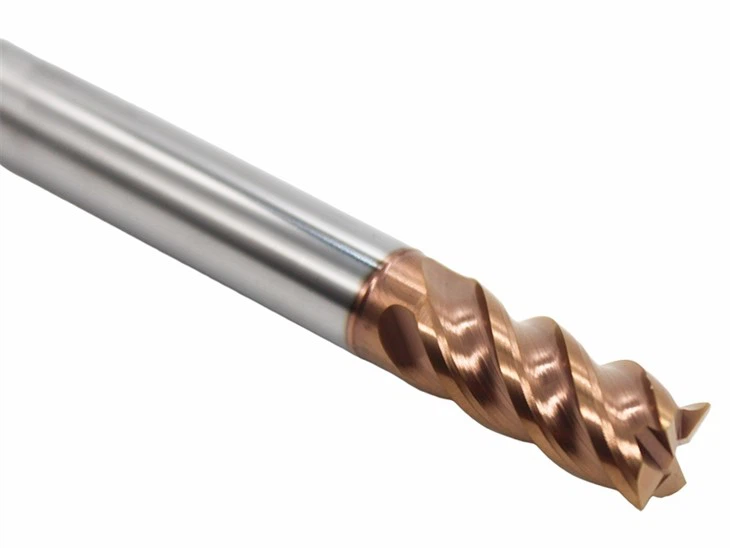

Finally, make a test cut on a scrap piece of material similar to the actual workpiece. Examine the cut to see if it meets your quality requirements. If the cut is rough, has burrs, or the dimensions are off, you may need to adjust the cutting parameters or re - check the cutter installation.
Troubleshooting Common Installation Issues
Even if you follow all the steps correctly, you may still encounter some issues during or after the installation. Here are some common problems and how to fix them:
- Vibrations: If you notice excessive vibrations during the milling operation, it could be due to a loose cutter, misaligned arbor, or incorrect cutting parameters. Check the cutter installation, tighten any loose components, and adjust the cutting depth and feed rate.
- Poor Cutting Quality: A rough or uneven cut may be caused by a dull cutter, incorrect alignment, or improper cutting parameters. Replace the cutter if it's dull, re - check the alignment, and adjust the settings as needed.
- Cutter Breakage: This can happen if the cutter is overloaded, installed incorrectly, or made of low - quality material. Make sure you're using the right cutter for the job, follow the installation steps carefully, and don't exceed the recommended cutting parameters.
Conclusion
Installing a T - type Milling Cutter correctly is a multi - step process that requires attention to detail and following the right procedures. By doing pre - installation checks, selecting the right arbors and holders, installing the cutter properly, setting the correct cutting parameters, and doing post - installation checks, you can ensure optimal performance and a long lifespan for your cutter.
If you're in the market for high - quality T - type Milling Cutters or other cutting tools like Internal Turning Tools, we're here to help. We offer a wide range of products that are designed to meet your machining needs. Feel free to reach out to us for more information or to start a procurement discussion. We look forward to working with you!
References
- Machinery's Handbook, 31st Edition
- Various manufacturer's manuals for T - type Milling Cutters and milling machines